
How To Paint Holly
Last year, we created a post on our old blog teaching you how to paint a beautiful sprig of holly, because what's Christmas without a little holly? Below is our step by step tutorial to help you have a go at painting your own corner arrangement, perfect for our square mount boards.
For this project, you will need:
General Supplies
Paper Towel,
Wet Palette and water pot
White/Black Transfer paper
Tracing Paper
Black practice paper
A4 Black Mount practice board (or similar)
Pen/pencil
Dotting tool (optional)
No 8 flat or angle luxe label brush for floating colour (you may find the angle brush easier to use)
Liner brush
Lamp Black
Tomato Red
Titanium (Snow) White
Avocado
Honey Brown
Light Buttermilk
Emperors Gold
*If you haven't got these exact colours, substitute for a suitable alternative. If you haven't got Light Buttermilk, mix a little light brown with your white. Colour mixing is fun and helps you make the most out of a small selection of colours if your stash is limited.
Skills
First, you will need to transfer your design onto your practice board or practice paper. Once you have done that, follow these steps...

Some DecoArt colours are more transparent than others so, if you are painting on to a dark surface, basecoat your design with white first to create a solid block of colour.
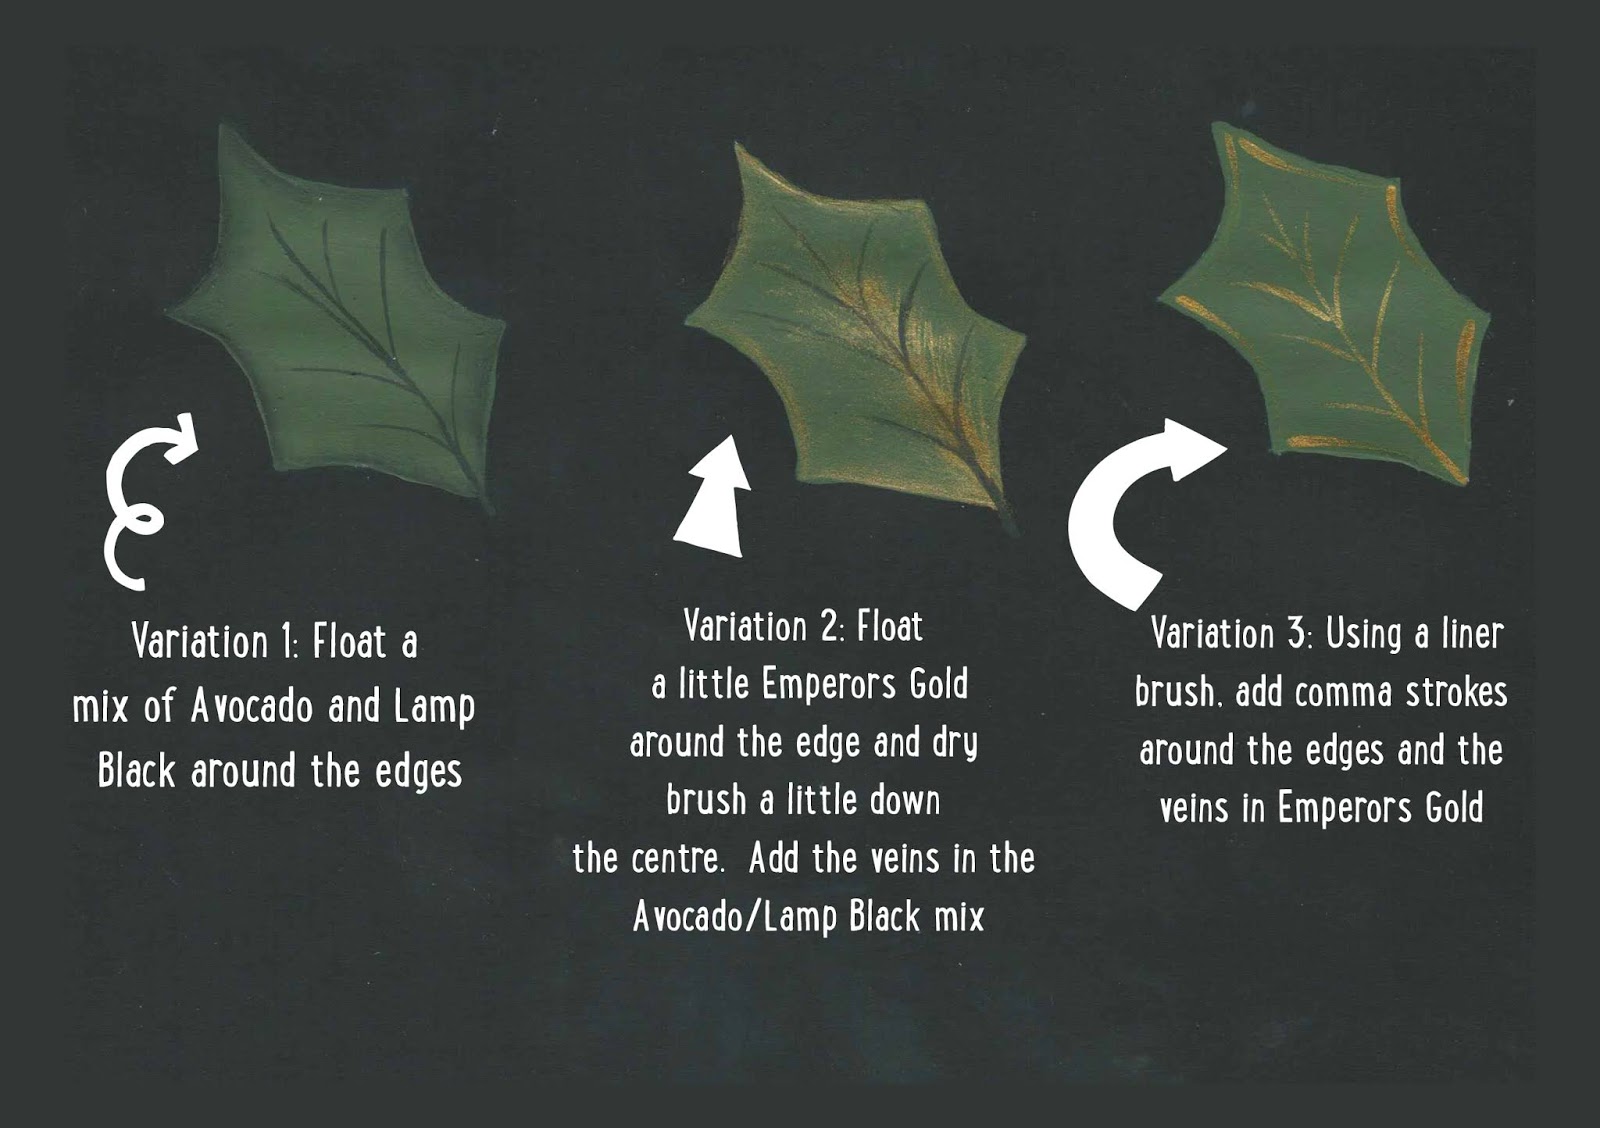
Depending on the colour of your background and the final look you prefer, you may wish to float a darker colour around the leaves.
If you have joined us after we launched our Folk Art Masterclass for Beginner painters, you may not have discovered the floating technique (Carol teaches this skill in the Intermediate course due to be released in the very near future). If you don't know how to float, or are not confident enough to use this technique, add comma strokes around the leaf as we did for Variation 3 above.
As with all of our projects, we recommend playing around with these ideas to discover for yourself which ones you prefer. If you aren't confident in how to dry brush, check out Carol's video here. To dry brush the Gold, we used a small old round brush so I did not ruin one of my 'good' brushes.
Now for the berries....

Basecoat your berries however you feel comfortable. Use 'C' strokes with the Flat or Angle brush or comma strokes using a round brush. Again, you will probably find that you need to give them two coats of red before adding the finishing touches. If you do not feel confident to use the liner brush, create a comma stroke using the small end of the dotting tool.
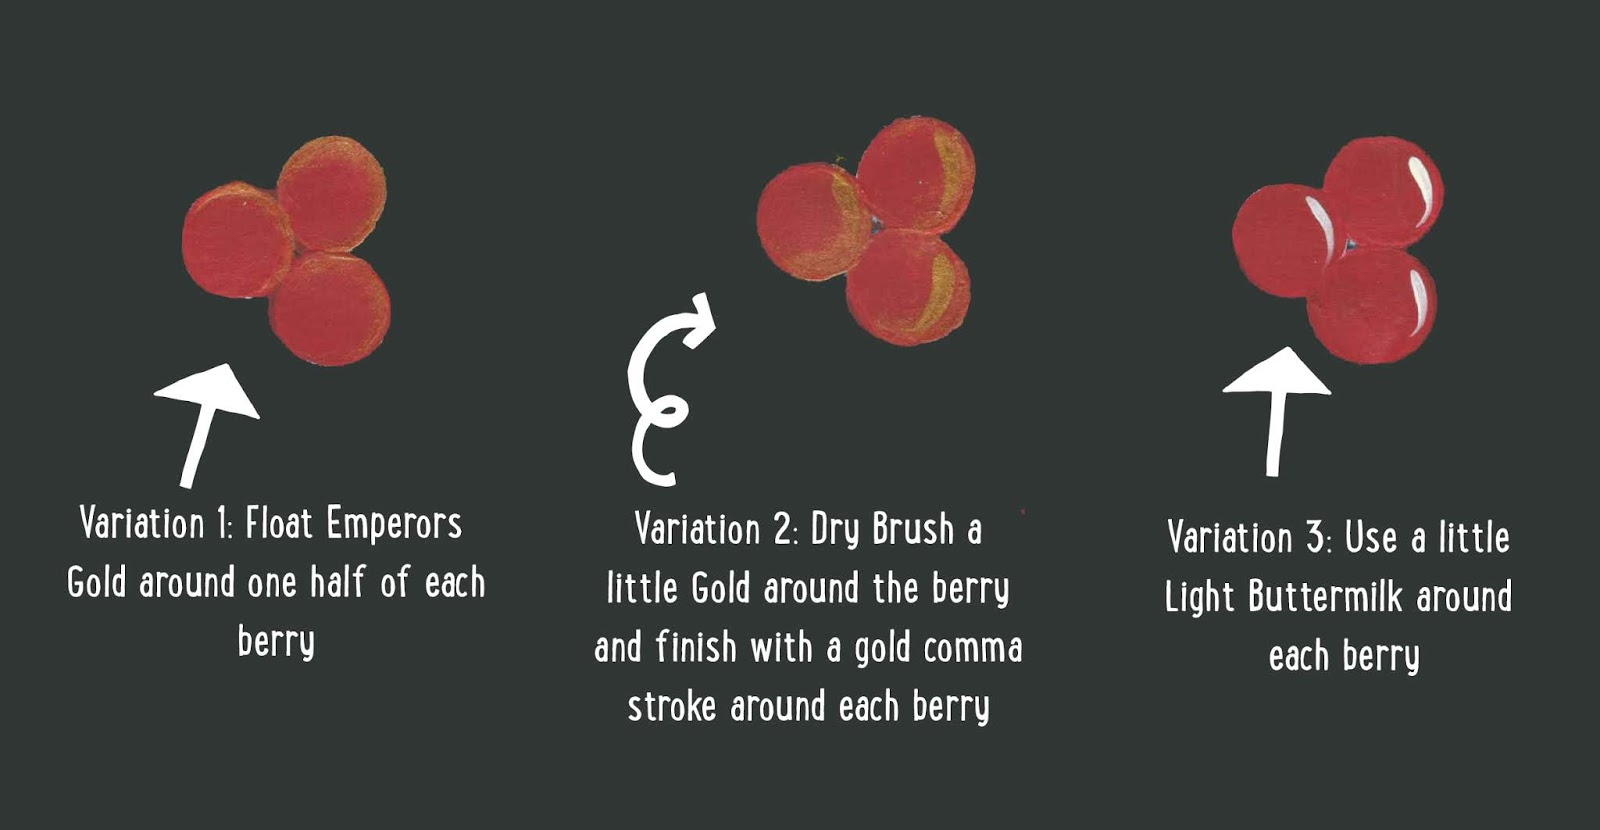
Using different techniques creates a range of different looks. Floating colour around each berry can be tricky but creates a lovely soft shade to the berries. You can get a similar look by dry brushing with an old round brush (which also gives you a little more control).

We do hope this guides you through the process of painting your own sprig of holly and that you enjoying finding your own style. We had great fun designing this pattern and tutorial for you and they will certainly be featuring in a few of our Christmas cards this year, we hope they will feature in yours too. If you have a go at this tutorial, please tag us in your posts, we would love to see what you create.
Keep an eye out for another fun project using this tutorial very soon!
Until next time x