Painting Projects Perfect For Easter Time
Even if you started painting to relax and unwind, that does not mean that you can't mix up your practice with a few Easter themed projects. The great thing about all the brushstrokes and designs we teach in our painting masterclasses is that they can be used in so many ways! This week we've taken a few of the designs, a few Easter images and let the inspiration flow. Check out each one below.
Daisy Doodle Easter Bunny Painting
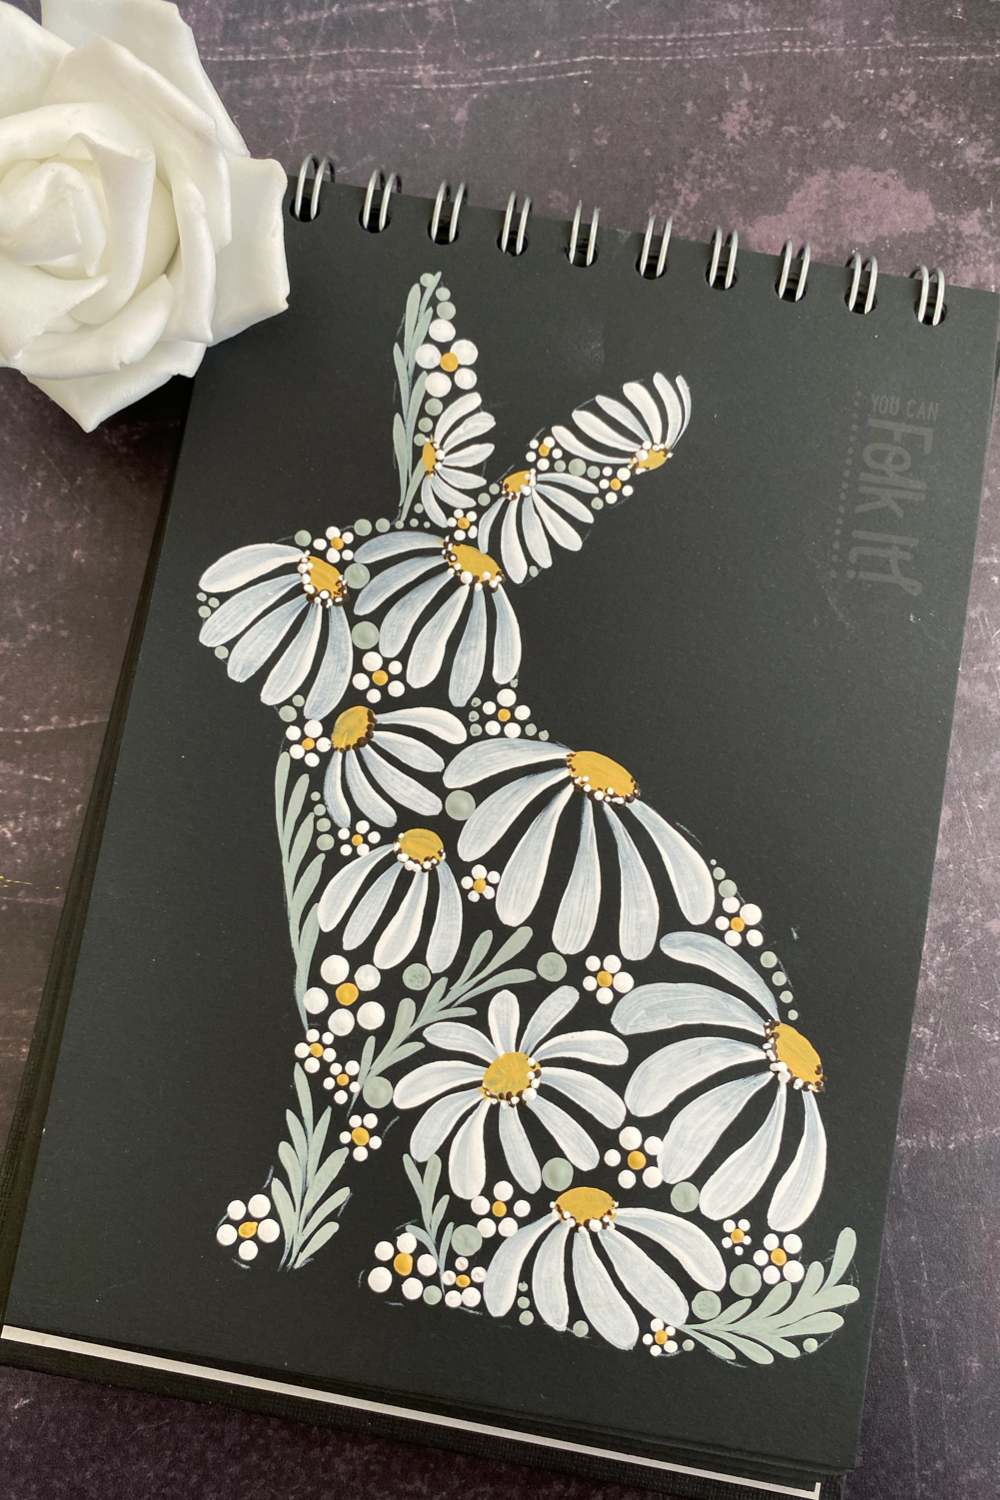
We love filling in different silhouettes with different flowers and designs from our Masterclass For Beginner Painters. For this cute Easter rabbit we concentrated on using different kinds of daisies.
Step 1: Transfer the design on to your sheet (you can find the pattern here and it has been created for an A5 sheet).
Step 2: Begin with the larger elements - use a No.3 Round Brush to paint the daisies marked in grey.
Step 3: Using a Liner Brush, paint the daisies marked in light blue around his ears.
Step 4: Using a light green (we used Silver Sage green but you could add white to any green you have), add the greenery using small comma strokes.
Step 5: Fill in any gaps with dotty daisies. For the larger spaces we used the larger end of the dotting tool, smaller spaces called for the tiny end.
Step 6: We found that we still had a few gaps but felt it would look too busy with more dot daisies. To fill the spaces, we used a slightly larger dotting tool (if you haven't got any larger dotting tools, use the end of a pen or something similar).
Painted Easter Egg Shapes

For this project we cut out easter egg shapes and began decorating them. These are rather large versions but why not cut out smaller ones to decorate and turn into gift tags or clue cards for Easter hunts.
C Stroke Easter Egg:
The egg uses the c stroke as we do it our c stroke heart design from the Masterclass For Beginners.
Step 1: Block off the centre using a couple of strips of low tack tape to create a clear space.
Step 2: Paint each line of c strokes across the bottom half of egg using different pastel shades before using the small end of the dotting tool to add a few decorative dots. The curve should face away from the centre.
Step 2: Turn your egg around so you paint the c strokes away from the centre again.
Step 3: Add the dots under each stroke.
Pivot Stroke Flower Egg:
For this egg, we painted our pivot stroke flower in each colour making sure to space them far enough apart so that we could fill in the spaces with other colours. Step 1: We used a No.10 Flat Brush and moved on to a Non8 flat brush for the smaller spaces.
Step 2: We used the small end of the dotting tool to add the centres in the same colour as the flower as we felt brown or black would have looked too harsh.
Easter Bunny Floral Wreath

There are so many flowers to learn in our masterclasses we thought why not create a beautiful frame for an Easter bunny picture?
For this design, you can find the pattern here.
Step 1: Transfer the design.
Step 2: If you are painting on black paper, using a No.8 Flat Brush, base coat the bunny in white first and leave to dry.
Step 3: Using a light brown (and the same brush) base coat your bunny.
Step 4: Paint the first layer of the hindeloopen style flowers using the No.3 Round Brush from the Masterclass For Beginners. Create the loose wreath of buds around the bunny using a liner brush.
Step 5: Add the finishing touches to the hindeloopen flowers and grass using a liner brush and dotting tool.
Step 6: Don't forget the bunny tail! Now you have base coated your bunny, the tail you marked out will have disappeared. Using your pattern and transfer paper, lightly add the outline for the tail. Grab your flat brush and using a couple of coats of white, fill in his fluffy tail.
Step 7: Of course, there is always room for a few dot designs too.
Easter Banner

For this one we painted an Easter banner in a mix of DecoArt Americana.
Step 1: Blend the colours in between before adding a few dot daisies.
Step 2: Add hearts to create a fun and easy project to hang in the home.
Dots are a great option for decorating freestanding wooden items, bunting or easter signs to give them a quick and beautiful makeover.
What will you be creating between now and Easter? Are you a person who goes all out on Easter decor or do you let it slide by with little to no fuss?
However you spend your Easter, we hope you have a great weekend.
Until next time x